Speakers
You can either add the speakers before or after setting the agenda, in this instance we are setting them after. Speakers will be linked to events and attendees will be able to see the speaker profiles related to the sessions when they are registering.
1. In the Agenda / Sessions page select Speakers.

2. Click the Add Speaker button.
The Speaker Editor will display:
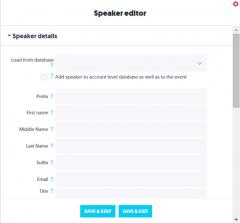
3. In the Speaker Editor set the following attributes:
| Field Name | Description |
|---|---|
Prefix | Speaker's prefix. |
First Name | Speaker's First name. |
Middle Name | Speaker's Middle name. |
Last Name | Speaker's Last name. |
Suffix | Speaker's suffix |
Speaker's email address. By default, this is not shown to registrants. | |
Title | Speaker's title. By default, this is not shown to registrants. |
Company | Speaker's company. |
Image | An image of the speaker can be uploaded here. |
Description | In th Websites module, this text will appear on your speaker widget and is limited to 150 characters. |
Bio | This area allows you to enter a bio about the speaker. |
4. Select Assign Session(s) to this Speaker.
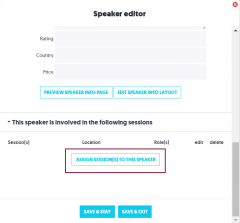
The Add Sessions Dialog Box will open.
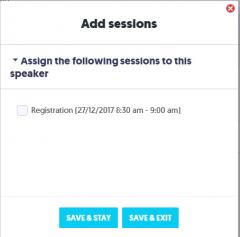
5. Select the relevant Session you wish to assign to the speaker.
6. Click on Save & Exit to return to the Speaker Editor.
7. From the Speaker Editor, select Save & Exit.
This Speaker will now be assigned to the Session and attendees will be able to view the speakers profile against the session when they are registering for your event.
Import Speakers via Excel
You have the option of importing the details of your speakers with a CSV file.
You may import new speakers, or update the records of speaker records already in your event.
1. Click the Import Speakers via Excel button.
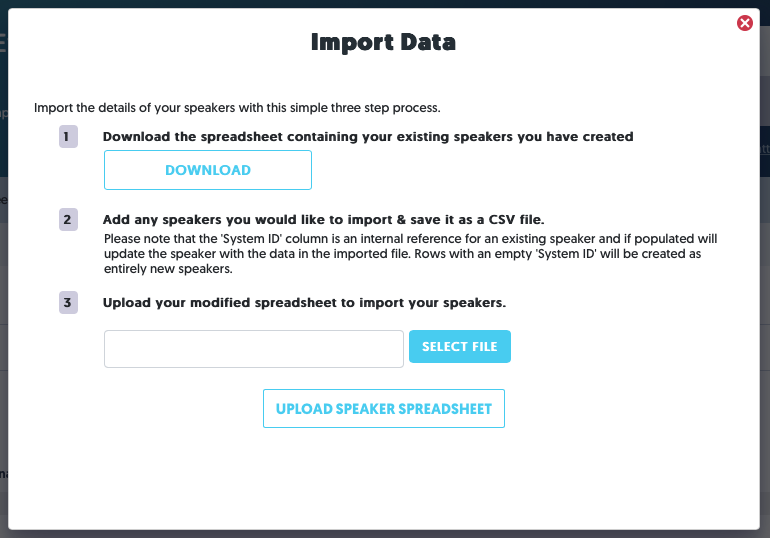
2. Click the Download button to download a spreadsheet containing your existing speakers.
If you have no existing speakers, the spreadsheet can be used as a template for preparing your speaker list for upload.
3. Open the spreadsheet, update any existing speakers and add any new speakers you would like to import to the spreadsheet.
Please note that the 'System ID' column is an internal reference for an existing speaker and if populated will update the speaker with the data in the imported file. Rows with an empty 'System ID' will be created as entirely new speakers.
4. Save your spreadsheet as a CSV file.
5. In the Import Data window, click the Select File button. Locate and select your CSV file.
6. Click the Upload Speaker Spreadsheet button to import your speakers.